Here is a link to the final video:
http://www.youtube.com/watch?v=kjRh3N1JuQA&feature=youtu.be
My input to the project was:
-Creating couple of jellyfish designs to choose from
-One color study for the jellyfish (concept work)
-Idea of adding a giant turtle
-Model of the jellyfish
-UV layout of the jellyfish
-Rig of the jellyfish
-Visual effects for underwater environment
-Plankton particles
-Plankton texture
-Model of the main character
-UV layout of the main character
-Rig of the main character
-Textures of the main character
-Lighting for 2 city scenes
-Modeling the lamp posts
-Buildings cleanup
-Textures cleanup
-Glow textures for the buildings
-Layout the jellyfish scene
-Animation of the jellyfish
-Adding city lights to the jellyfish
-Render of 3 scenes
Thursday, 24 November 2011
City lights in jellyfish
As we got closer to the deadline, we didn't have time to fit every building we've modeled into jellyfish. So instead, I've created lots of cubes and applied the surface shader on them with some glow.
Here is a close up render:

Then I've parented the lights to the root joint of the jellyfish and imported everything to the dynamic scene. In the scene I've made quick animation. We needed a lot of animation and I've done as much as I could, so I ended up with 12 seconds of animation. The animation still requires a lot of tweaking and refining but as I had only one day to finish everything I rushed and the result isn't fully satisfactory.
Here is the animation with the plankton dynamics:
Monday, 21 November 2011
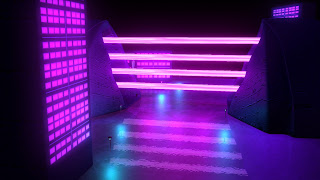
Lighting scene 3
As a base for this scene I've created four directional lights coming from four directions. The same as in the previous scene, the light from the right is pink and the light from the left is blue. They both have quite high intensity. The other two have colour between blue and pink and have low intensity just to get rid of black shadows. As this part of the city is the furthest from the tube in the middle I didn't really need any decay in the main lights.
Here is the render with only those four lights:

Then I've imported the lamp post and experiment with its size and light intensity.
Here is a test render:

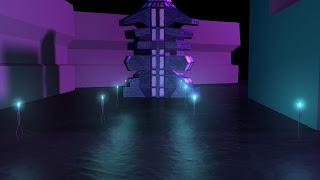
Then I've duplicated the lamp post and placed the copies in a sensible places.
Here is a render:

By looking at this picture, I've decided to add some light coming from the glowing tubes to cast some shadows. I've created 5 pink point lights along the tubes.
Here is a render:

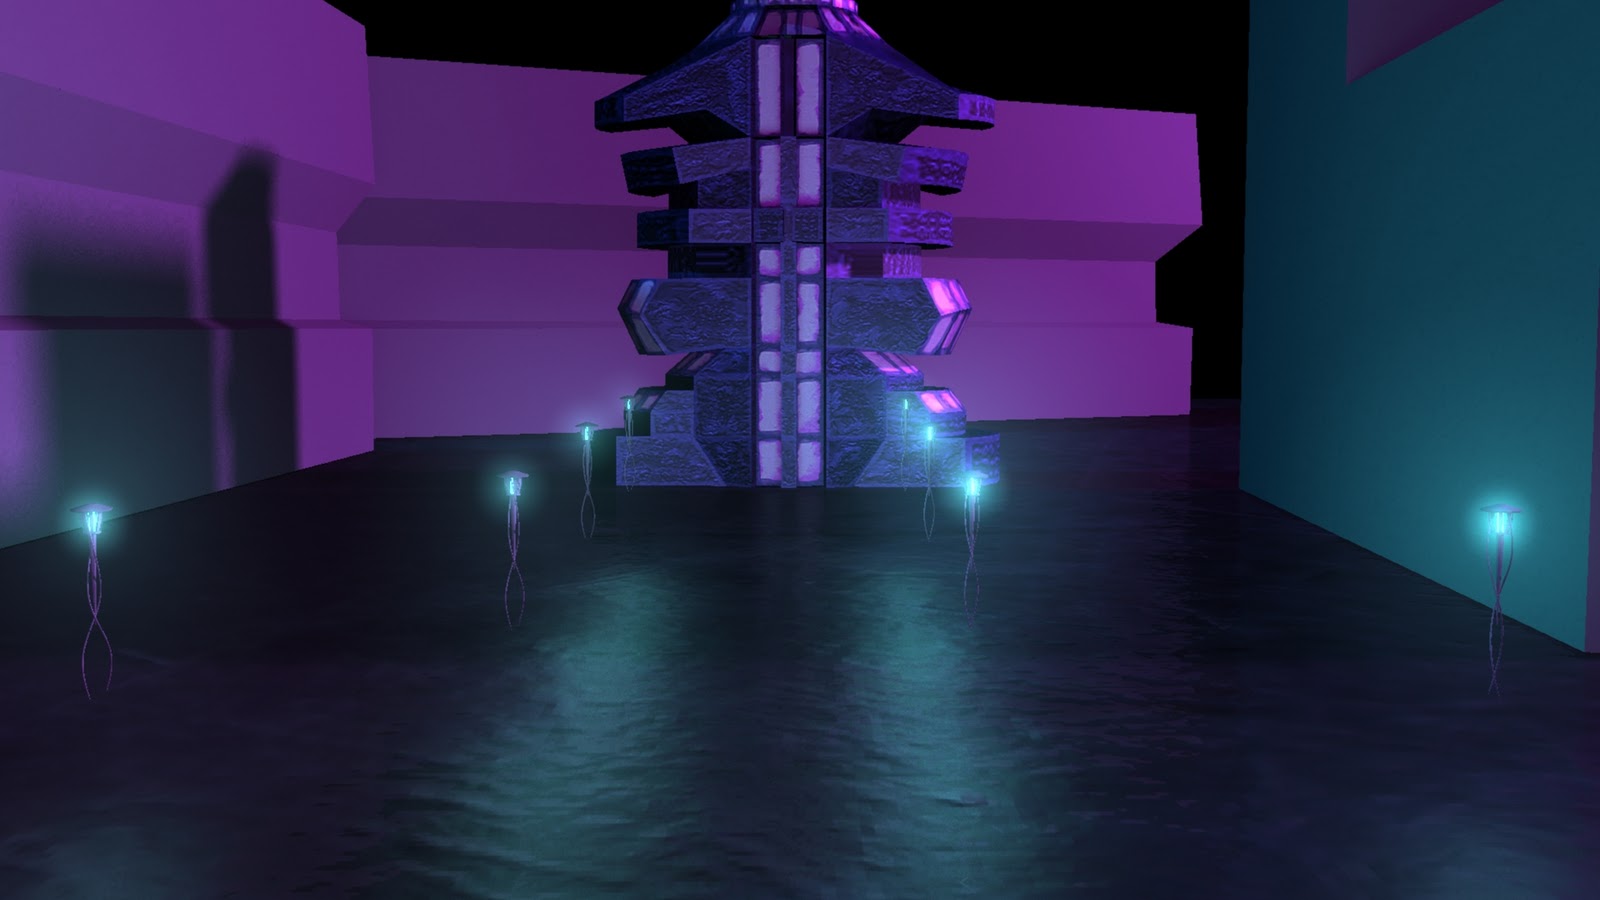
Then I've added textures to the rest of the buildings.
Here is a render:

And lastly, as in the previous scene, I've decided to apply the glow map to the windows.
The team agreed that this can be the final image.
Here is the render with only those four lights:

Then I've imported the lamp post and experiment with its size and light intensity.
Here is a test render:

Then I've duplicated the lamp post and placed the copies in a sensible places.
Here is a render:

By looking at this picture, I've decided to add some light coming from the glowing tubes to cast some shadows. I've created 5 pink point lights along the tubes.
Here is a render:

Then I've added textures to the rest of the buildings.
Here is a render:

And lastly, as in the previous scene, I've decided to apply the glow map to the windows.

The team agreed that this can be the final image.
Lighting scene 1
I was asked to do the lighting for two scenes. However, the only light sources in the scenes were the tube in the middle and the sun light. The light coming from the right is a pink directional light. But as this layer of buildings is the closest to the tube in the middle and I need some decay. So I've created an area light with linear decay on it. From the left, there is only one light coming and this is another directional light but with blue colour. I've also added one more directional light coming from the camera with very low intensity. This will get rid of any pitch black shadow. With only those lights the scenes looked quite boring.
Here is the render of the scene with only those lights in:

As you can see, the scene is very dark and definitely needs some more lights. Also the buildings need some textures.
I've decided to model some lamp posts and fit them in the scene. I was speaking about this idea with Simone. We've decided on the size and colour of the lamp posts. They will be very small compared to the rest of the buildings. They will be floating in the air and cast blue light.
Here is the model of the lamp post:

I wanted it to follow the concept of the jellyfish. I didn't lay the UVs for that, because it will be so small that no texture will be visible. Inside of the lamp post there is a cylinder with a surface shader applied to it with some glow.
Here is a render of it:

I've duplicated it and put them into positions we've decided with Simone.
Here is the render of the whole scene with the lamp posts in it:
Then I've noticed that the bump depth on the floor is too deep and the floor looks like water. So I've lowered the bump depth.
Here is the render:

After that,I've applied textures to the buildings.
Here is a render of that:

By looking at this image, I've decided to create glow maps so the windows are glowing creating an effect of the light inside of the buildings. I had small problem with glow maps. I thought that they are driven by black and white values of an image. But when I darkened the image the glow didn't change. I've figured out that the glow is driven by the opacity. I've set the window opacity to 20% and deleted the rest of the image. This has given me this result:

Everyone in the team likes this image and we've decided that this is the final one.
Wednesday, 9 November 2011
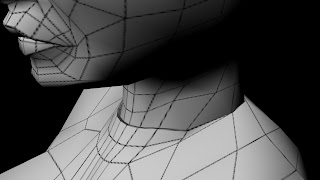
Rigging
After I lay the UVs, I've rigged the character. The rig is very simple, but will allow to animate the character according to the storyboard. For arms and legs I've used IKs. There was no need and time to make a switch between FKs and IK in the arms. Legs and feet are fully rigged as the character will be walking a lot. For the sine I've used spline IK. The hands are very simple. They have only one control to make a fist. All fingers move together as we don't need to move them separately. This has saved a lot of time. Also there is not many blend shapes. I've created few simple expressions: open mouth, blink, angry and surprised. Those blend shapes can be mixed together so they should be enough to follow the storyboard. I've also created additional skeleton for her hair. I want the hair to follow the body in natural manner. So I've attached the skeleton to the tip of the head joint and applied a spline IK throughout the hair. Here are screen shots of the rig:


UVs
Before I rig the model I want to lay down the UVs. This will allow the animators to animate the character before texturing it. This will allow the animators and texturers to work simultaneously. The model of the girl is made of five objects, so for each object I've lay the UVs separately. Here are UV snapshots:


Friday, 4 November 2011
Finished Model
I've added the eyes and the eyebrows to the existing model. Then I started working on hair. The hair was really time consuming and was difficult to keep everything in quads. But eventually I got it. Here is a clip of the wire frame:
And here is subdivided model:
And here is subdivided model:
Wednesday, 2 November 2011
Cuts
I've cut the mesh to create the holes in girl's wet suit. While I was cutting it, I was keeping an eye on keeping everything in quads and at the same time give the mesh some logical edge flow. Here are the renders of the cuts:


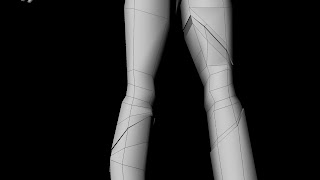

I've managed to keep everything in quads, but I'm not very happy with the edge flow. I've decided to subdivide it and see how it's going to look on a smooth model. The result wasn't so bad, so I'll leave it like than. Here is a clip of a smooth model, I didn't show the wire frame here because I wanted to just focus on the surface:


I've managed to keep everything in quads, but I'm not very happy with the edge flow. I've decided to subdivide it and see how it's going to look on a smooth model. The result wasn't so bad, so I'll leave it like than. Here is a clip of a smooth model, I didn't show the wire frame here because I wanted to just focus on the surface:
Girl BaseMesh
To improve our story, we’ve decided to add a character to the environment. The main character is a girl who is curious of the world outside the jellyfish. The team asked me to model and rig the girl.
I was given nice image planes by Simone:

Based on them I’ve modelled a base mesh of the girl’s body:
Now I will need to figure out the cuttings in this mesh to match the shape of her outfit. This is going to be a bit of a challenge to keep the edge flow relevant to the designs and keep everything in quads. I need to make these cuts to be able to extrude along them. The extrusions will add thickness to the outfit. Here is an image where I’ll add those cuts:

Plankton Speed
I've rendered the particles and showed them to my group. The group has decided, they move too fast. Here is the clip:
So I've slowed it down 5x. I've achieved this by decreasing all the values. Here is the clip:
So I've slowed it down 5x. I've achieved this by decreasing all the values. Here is the clip:
Plankton Particles
As I’ve done the image of plankton, now I need to assign it to the particles. I’ve created polygon plane and applied the texture with the plankton to it. I’ve attached it to the particles using instancer. However, I wanted my planes to always face the camera to create effect of sprites. So I’ve added some extra per particle attributes: plankton scale pp, sprite world up, sprite aim pos, sprite aim axis and sprite aim up axis. And then I’ve written short expression:
Plankton.spriteAimAxis = <<0, 1, 0>>;
Plankton.spriteAimUpAxis = <<0, 0, 1>>;
Plankton.spriteAimPos = <<UnderwaterCam.tx, UnderwaterCam.ty, UnderwaterCam.tz>>;
Here is a play blast and render:

As you can see the sprites are too big. To decrease the size I’ve resized the first plane I’ve created to 0.05. Here is another render:

I also want to have a lot more of them, so I’ve increased emitter rate from 25 to 100. I’ve also hidden the emitter plane. And another render:
Photoshop
I’ve chosen an image of plankton that I liked the most and using Photoshop I’ve made it black and white with very high contrast. This needs to be black and white, because I’m going to connect it to transparency in Maya. Here is the image before and after:


Plankton Research
I’m going to connect a polygon plane to each of the particles with an image of plankton. But before I go to Photoshop to create that image, I need to know how the plankton looks like. I’ve looked at some images of the plankton.


Monday, 31 October 2011
Particles
To make the water even more believable, I've decided to do plankton particles. To create a plankton effect I’ve created a nurbs plane and set it as an emitter. But the particles were going straight up and quite fast. To decrease their speed I've created a gravity field and set the magnitude value to -0.1. And to add some randomness in the movement I've added turbulence field and set the magnitude value to 50 and frequency value to 0.5.
Here is a play blast of the particles:
Underwater Dynamics 2
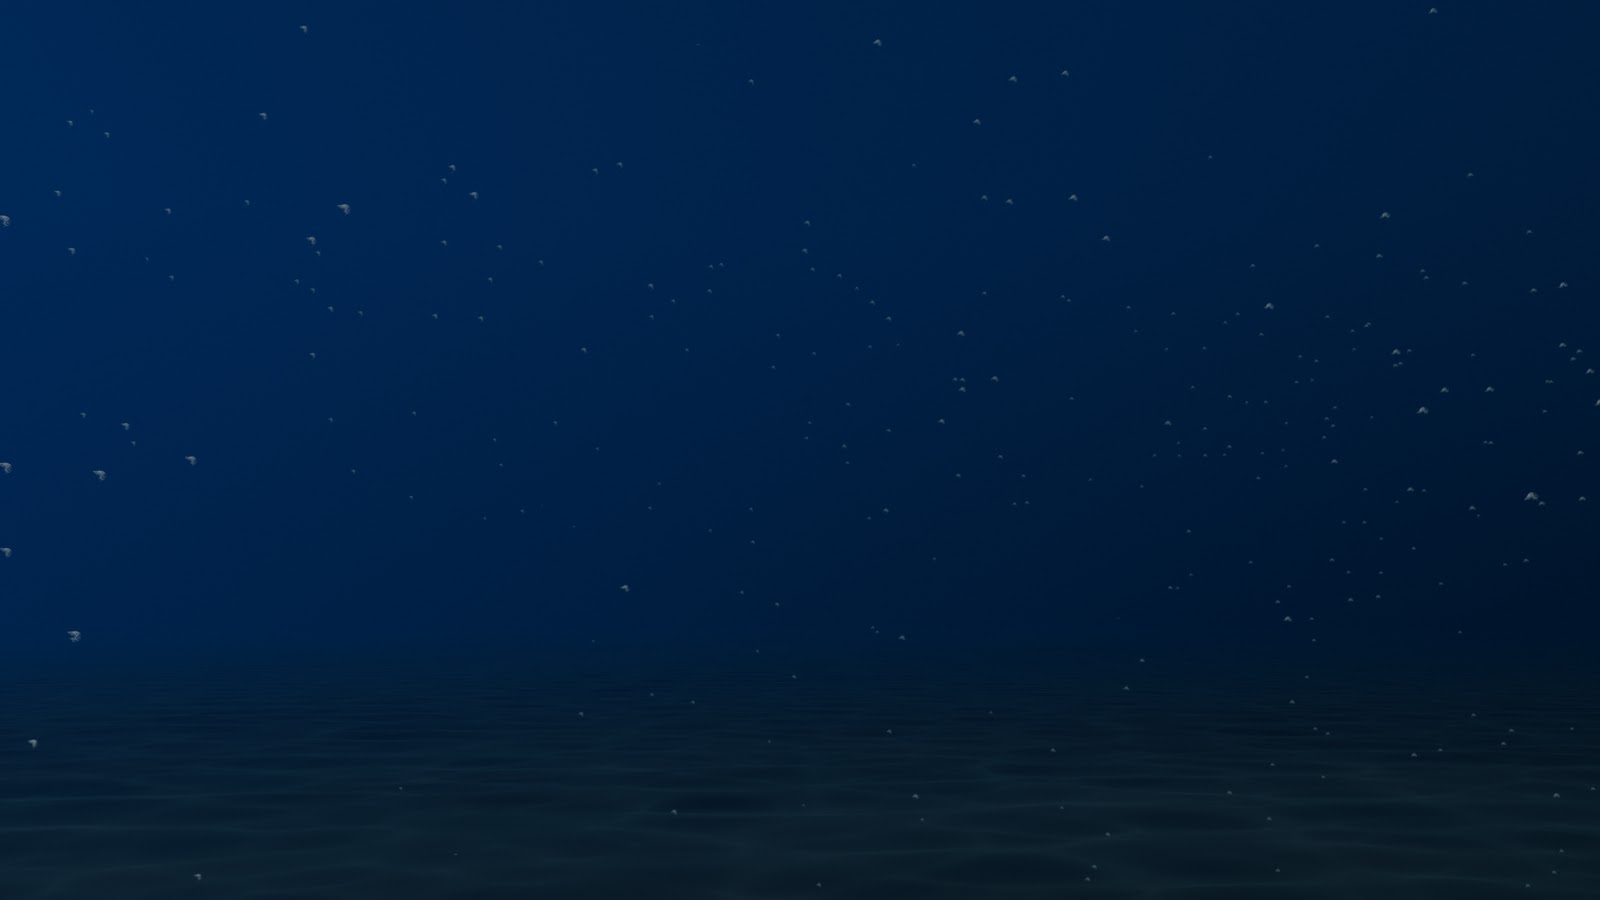
Another thing I wanted to create the effect of the underwater. To do it I've used paint effects. This creates a fog, ambient light and directional light. The directional light has a sequence attached to it, so it gives a similar effect to one I wanted to achieve with spot light. Here is a short clip of the underwater environment I've managed to achieve:
Underwater Dynamics 1
As my group don't have a visual effects artist, they've chosen me as this is my second role. I was asked to do some underwater dynamic tests. I've started by working on the spot light. I wanted to get the light rays similar to the underwater in real life. So I've created a spotlight and added fog to it. To make the fog look like rays I needed to add a texture to the light. To create a nice water-like texture I used AfterEffects. I've rendered four second sequence of this texture.
I wanted to apply this sequence to the light but for some reason Maya haven't allowed me to do so. So by now I've added only one frame of the sequence.

I wanted to apply this sequence to the light but for some reason Maya haven't allowed me to do so. So by now I've added only one frame of the sequence.

Animation Research
Also to be able to complete those tests I had to look at some jellyfishes and how do they move. Here are some links from Youtube I've been looking at:
http://www.youtube.com/watch?v=NbpB5F9CcLc&feature=related
http://www.youtube.com/watch?v=Cq6UVGSr79k&feature=related
http://www.youtube.com/watch?v=osuVKvYf7kU&feature=related
http://www.youtube.com/watch?v=vgqJpdJu03Q
http://www.youtube.com/watch?v=ZsAsuQoIwok&feature=watch_response
http://www.youtube.com/watch?v=NbpB5F9CcLc&feature=related
http://www.youtube.com/watch?v=Cq6UVGSr79k&feature=related
http://www.youtube.com/watch?v=osuVKvYf7kU&feature=related
http://www.youtube.com/watch?v=vgqJpdJu03Q
http://www.youtube.com/watch?v=ZsAsuQoIwok&feature=watch_response
Animation Test
Once the rig is complete I started testing it. First I animated the hood:
Then I added two main tentacles. I tried to match their movement with the hood. The movement is slow because I wanted to get an effect of the size of the jellyfish.
Then I added the rest of tentacles and body. This took a lot of time as I wanted each tentacle to move differently. This is just a test animation, so it needs a lot of tweaking, but at least we know the it's working. Here is the whole jellyfish moving:
By doing these tests I was able to spot any mistakes in the rig. I discovered that the weights were wrong in some places so I could easily fix that.
Rigging
Once I've done the UVs I started rigging. Firstly I wanted to use dynamics to animate all of the tentacles. But then I've decided this wouldn't be that flexible to animate as it prevents posing the jellyfish. So I've created controls to each tentacle. The rig is made of spline IKs. I've attached clusters to the spline curves and constrained the controls to the clusters. To clean up the view for the animator I've hidden the joints and deformers. I've also put some colours to the controls so their not that confusing. This might be the longer approach but in the end it will allow much more interesting animation. Here is a screenshot of the finished rig:

And here is the jellyfish with only controls visible:


And here is the jellyfish with only controls visible:

UVs
Before the rigging I wanted to lay down the UVs. This is because, if I lay down the UVs on the rigged model I would need to repaint weight and this is a lot of extra work. To lay the UVs I've used UVLayout. Here is UV snapshot of the jellyfish:

To check if the UVs are lay down correctly and don't overlap or stretch I've applied a simple checked texture. This clearly shows any irregularities in theUVs. Here is a simple animation of textured jellyfish:

To check if the UVs are lay down correctly and don't overlap or stretch I've applied a simple checked texture. This clearly shows any irregularities in theUVs. Here is a simple animation of textured jellyfish:
Wednesday, 26 October 2011
Modelling
Finally, I could start modelling. I was asked to model the jellyfish and do some movement tests. To model The jellyfish I've used polygons. I've tried to keep the poly count as low as possible. I've managed to model whole jellyfish with 1996 polygons. Here is an animation of the model:
Concept Art
My main team role is a modeller/texturer. However, I've spent some time doing some concept art just to share my idea of colours and lighting.


Choosing the Final Jellyfish
Simone has also created some thumbnails. Taking all of the designs into account we've chosen the best bits and Simone has drawn the final jellyfish.


Jellyfish Thumbnails
Based on my research, I've drawn nine different jellyfishes. I wanted to have wide variety of designs to choose from. I've numbered them and showed them to my group to choose and mix the best ones.


Subscribe to:
Posts (Atom)